I have to confess this is one of the most requested blog post in Web Deployment via either direct emails, comments on the blogs, twitter, in conferences etc and it has been completely my bad to have prolonged this as long as I have. As it is said - better late than never, so without any delay let us get started.
In this blog post I am hoping to cover the topics of setting up your web deployment using Web Deploy (MsDeploy) and Team Build. When we talk about automated web deployment with Web Deploy (I love our naming J) there are multiple aspects that come into mind, let us clear few of the concepts before we proceed with the walkthrough:
· Web Packaging – Web Packaging is the process of creating a .zip file which can contain your web content (pages, images, CSS, JavaScript files etc), databases, IIS Settings, Application creation, ACLs etc. From your Team Build you can easily create Web Packages which you can ask your server admin or Test team to pick up and install on you web servers for testing. With Web Packages (.zip files) you will also get a .cmd file created by VS 2010 which can be run to install the package. There is not a direct automation to run this command file from team build but you can easily hook up post build step to execute the .cmd file if you would like to automate the installation of the package as well.
· Web Publishing – Web Publishing is the process of directly taking the source application (in Team Build case the sources are hopefully in your TFS source repository) and directly pushing it to the destination web server. In this case a .zip file is not created but if you would like that for archival then that is possible as well. If you want your web servers to have your latest web application installed in Continuous Integration (CI) fashion then Web Publishing is the direction I would recommend.
Note - Web Publishing can only work when you have your Web Servers configured to accept Web Deploy request. There is an earlier blog post about Setting up your Web Servers for Web Deploy, without having your Web Servers setup the below walkthrough (Publish Section) will not succeed so please make sure that you have your Web Servers configured correctly before proceeding.
Step 1: Get your TFS Build Server and Source Code Control Set up
I am going to assume that you have a license for VS 2010 TFS environment setup. Below are the simple steps to have TFS setup using basic configuration (i.e. everything installed as shown belowJ)
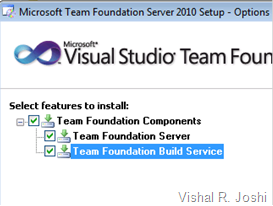
Once the product has installed and you get a successful “Setup is complete” dialog, finish the installation and you will see a TFS configuration wizard. First let us configure Team Foundation Application Server and then configure the Team Build service as shown below:
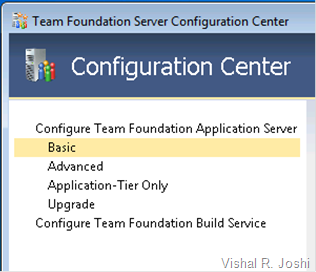
The TFS Basic install is sufficient as it is the simplest setup option and honestly it does most of the stuff that I need. Honestly in my opinion it is so many times better than TFS 2008 which was much more complicated to set up. For nearly all of the screens just simply keep clicking next and eventually the set up wizard will finish and hopefully you will agree with me that this setup is indeed a breeze.
Once the server configuration is complete, start the wizard for to Configure Team Foundation Build Service and it will come up with a Welcome Screen below:
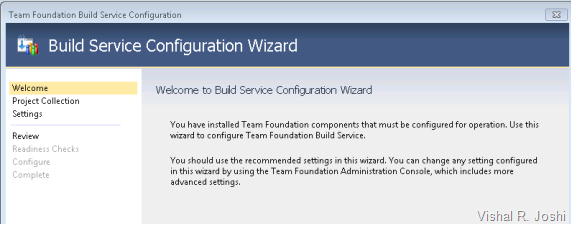
Again, click Next for each page and accept the defaults, before even you know you will have a functional TFS server ready to go. I know that the above explanation will sound like a joke but really TFS 2010 setup is as simple as that and it is difficult to complicate it unless you really require all the bells and whistles. I did have a loaded Microsoft software box but if you don’t then there might be some minor pre-requisites required but I am sure the setup wizard will let you know that J
Glitch: Now there is one glitch in this entire set up still which I need to call out for you. When you build your web projects, you need the Team Build service to have all the .targets files your projects needs. The TFS installation I showed above does not include all the targets files that comes with Visual Studio 2010. To get the necessary files on your machines, install Visual Studio on the same machine as your TFS server so your projects can build successfully. Now that certainly does not sound very nice so the alternate back door option is to go to %Program Files (x86)%\MSBuild\Microsoft\VisualStudio\v10.0 on your Visual Studio IDE box and copy the target files on your Team Build Server at the similar path. For Web deployment you will most likely only need “Web” and “WebApplications” folder but there is nothing wrong with having all the tasks and targets there just in case you need them later.
Step 2: Connecting to your TFS server from Visual Studio and getting your project into source control
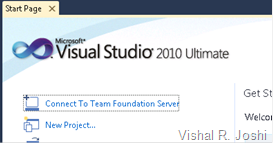
On the home screen of VS 2010 you now have an option to Connect to Team Foundation Server or alternatively you can do so from the “Team” menu within VS too as shown below:

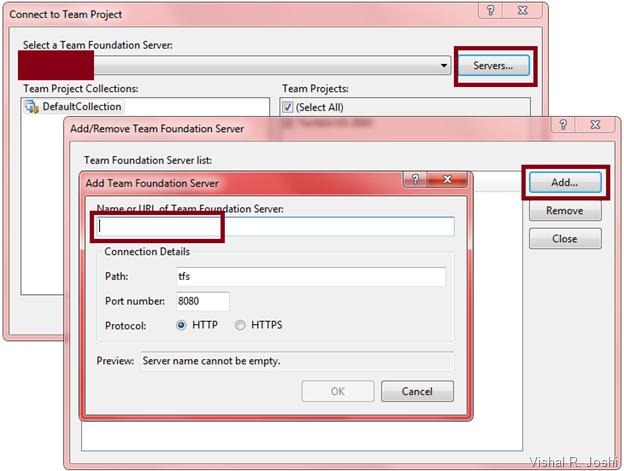
You will then see the “Connect to Team Project” dialog where you point to your TFS Server. If your server isn’t already populated in the server list drop down, you can add it clicking the “Servers…” button:
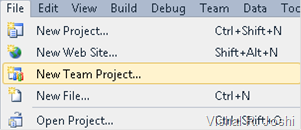
Once you are connected, you need to create a new Team Project from the File menu:
Give your team project a name and click through the wizard to create your Team Project and finish the wizard. Once your team project is created, you are ready to get your app into the source code control.
If you need further help in setting up your source code control and build server then check out the links below:
· TFS 2010 Installation Guide
· Using Version Control with TFS 2010
· Understanding basic Build with TFS 2010
Step 3: Get your app running and checked into TFS Source Code Control
Well you know how to get your app up and running so I will not dive into that J but just for reference of this walkthrough below the is app I am using. I created this Web App for TechEd US 2010 in New Orleans using MVC Music store sample on CodePlex. (You can watch the TechEd US 2010 video here) As you can see in the sample below it is working on my localhost.

The site is also checked into my TFS source code control as shown below:
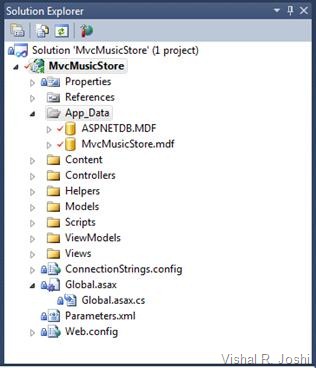
To check your application to Source Code Control you simply need to right click it and the menu options will guide you from there.
Step 4: Connect to TFS using Team Explorer
On VS 2010 Team Explorer you will find a button on the top right which will allow you to connect to a team project. When you click the button and select your Team project your Team should similar to what I have below:
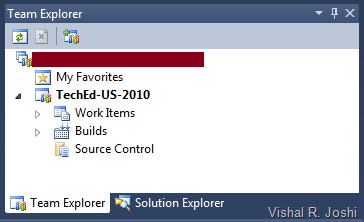
Step 5: Create a new Build Definition
A build definition instructs TFS on how to trigger the build. In this case we want deployment to accompany the Build too so we will create a new Build Definition and configure it accordingly. For that right click on the “Builds” node of the Team Project and click “New Build Definition”
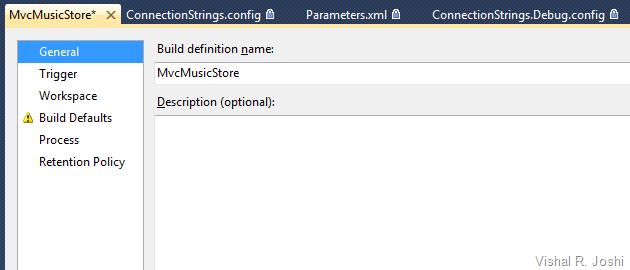
At this point you will see the below dialog where you can name your build definition appropriately.
Step 6: Configure your Trigger in TFS 2010 Build Definition
Trigger configuration informs Team Build on when to fire a build there are several options as shown below and I will explain them at high level for you to be able to make the right call
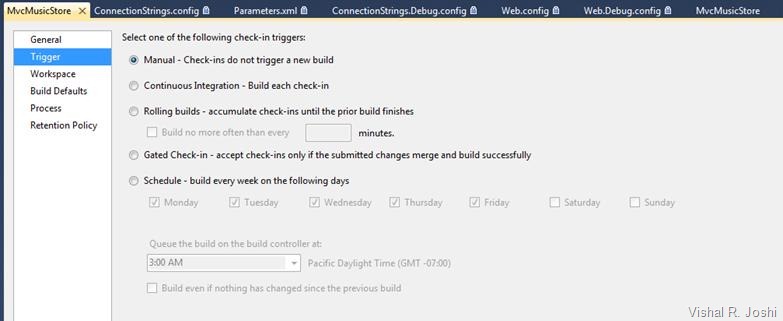
· Manual – As the name suggests this mode allows the Build to be triggered manually as you desire, for demo purposes I am going to use this but ideally you want to explore other options also to determine what works best for you.
· Continuous Integration – This is classic celebrated CI model where every check in into the source code control will cause a build and hence resultant deployment that we would configure.
· Rolling Builds - Sometimes when working in massive teams CI can be disruptive as there are several check ins happening every other hour. In that case you can inform your dev team that there will be a build happening every X minutes and they should plan for that. During end game period of the project this configuration may help to have routine quick builds coming out.
· Gated Check-Ins - This was one of the highly requested features for teams who did not want any broken builds due to bad check-ins. This will ensure that only check-ins which merge & build successfully.
· Scheduled Builds – As name suggests you can also have builds coming out during regular times every day. This is the model which is used by larger VS and .NET teams in general, we too get our builds created on a nightly basis. The funny part is that I do not think that VS & .NET build configuration is as easy as TFS 2010 makes it for everyone else J
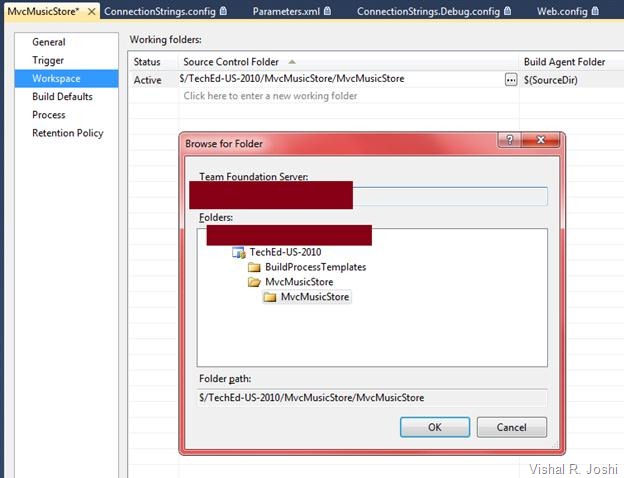
Step 7: Configure your Workspace which needs to be built
This is where you specify what you want to build. As shown below I have configured my Project folder as the build target.
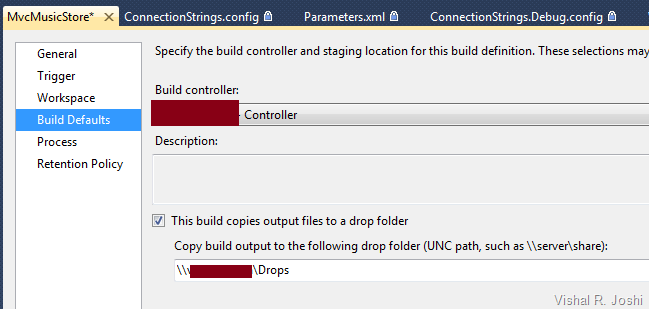
Step 8: Provide Drop Location where you want your builds to be dropped
This is relatively a simple step for creating a UNC folder with correct folder permissions so that your TFS build (which typically runs under NETWORK SERVICE) has correct permissions to write to build output path. My setting looks as below:
Step 9: Setup the Retention Policy
Retention Policy simply informs how to save the builds in the drop folder mentioned above. I did not modify mine so it looks as below, although you might want to change these settings based on the disk space that you available:
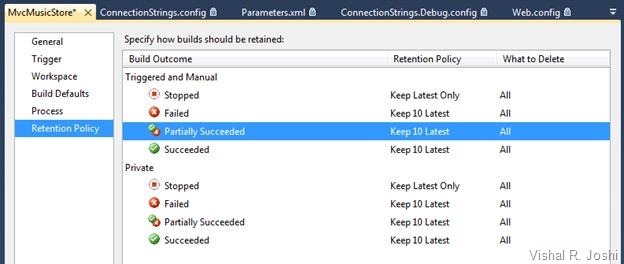
Step 10: Configuring the Deployment Process
For this you have to go to the “Process” tab which looks as below:
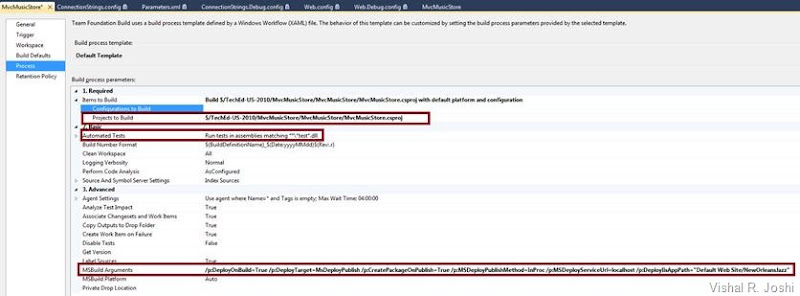
Most of the items in these are self explanatory but I want to spend some time explaining a few which matter in our case:
· Automated Tests – TFS allows you to run the tests in Tests.dll automatically during each build so if you would like to have some unit tests run during build and deployment then this is a great place to mention that. There is also a flag to stop running the tests in the grid which you can set if you do not want to disturb your configuration of this property.
· MSBuild Arguments - This is the location where you need to specific the hooks to mention that you want to trigger deployment as part of the build.
o Web Packaging – For Web Packaging the argument you want to specify is simply:
/p:DeployOnBuild=True;
The above property is going to tell the Web Publishing Pipeline (WPP) to engage after the build is successful. At the default target which executes is Packaging you should not need to provide any other properties.
o Web Publishing – For Web Publishing the arguments you want to specify are:
/p:DeployOnBuild=True /p:DeployTarget=MsDeployPublish /p:CreatePackageOnPublish=True /p:MSDeployPublishMethod=InProc /p:MSDeployServiceUrl=localhost /p:DeployIisAppPath="Default Web Site/NewOrleansJazz" /p:UserName=domain\user /p:Password=myPassword
In this case because we want publishing with Web Deploy to happen we provide /p:DeployTarget value to be MsDeployPublish.
/p:CreatePackageOnPublish allows you to create a package before publishing, it will help you keep an archive of what you published on your local drops folder. Although do note that It will certainly slow down the deployment and eat your disk space so choose it as you see fit.
/p:MsDeployServiceUrl tells the WPP where the project needs to be published to. In the beginning of this post I had mentioned that you need to set up the remote Web Server for Publish, this is the place where it finally gets used. The URL format is typically https://ServerName:8172/MsDeploy.axd. As I am using localhost as my build as well as test server I do not need to provide the full URL (i.e. VS 2010 will complete it as needed) but since your test server is going to be different than build server in real world you will have to provide full URL.
[UPDATE: It was brought to my attention that I had missed a detail in this post which is certainly worth clarifying. If you are using the Service URL by setting up the server as explained above then you will have to change MSDeployPublishMethod from InProc to WMSVC so the property should become /p:MSDeployPublishMethod=InProc to /p:MSDeployPublishMethod=WMSVC Note that if you are publishing to localhost VS can use Web Deploy APIs directly within the same process of VS hence I was using InProc as my option. If you are publishing to a different server then InProc will not work and give you errors so please make the above change. Apologies for missing this detail earlier.]
/p:DeployIisAppPath tells the publishing system the IIS Site Name/App Name that you want to publish to. E.g. Default Web Site/MVCMusicStore
/p:UserName=domain\user is the actual User Name which has access to the remote Web Server on which you set up the Web Deploy Publishing
/p:Password=myPassword is the actual Password for the User Name above
NOTE: Do note that the sample here can only publish to IIS 7 (Win2k8 and above), if you are running IIS6 or lower (i.e. Win2k3/ Win2k) then you need to follow slightly different process. Please drop a comment here and I will write a follow up post on that.
o File Copying – This will allow you to simply to a xCopy deployment without needing to setup any remote service
/p:DeployOnBuild=true /p:DeployTarget=PipelinePreDeployCopyAllFilesToOneFolder /p:_PackageTempRootDir=\\BuildServer\BuildDrops\MVCMusicStore /p:AutoParameterizationWebConfigConnectionStrings=false
/p:_PackageTempRootDir allows you to specify the remote server location on which you want xCopy to happen. Again the remote location will need permission to be writable by Team Build Agent which is running the deployment
/p:AutoParameterizationWebConfigConnectionStrings=false essentially tells WPP to not parameterize the Web.Config file since doing so will introduce replicable tokens within Web.Config which are used during Packaging & Publishing.
NOTE: File Copying was honestly never designed out of the box to be used from Team Build in such fashion but some people have been interested in using Web.Config Transformation during xCopy and hence I thought it was worthwhile mentioning this in the blog.
PS: Using properties which begin with underscore “_” is not typically recommended as they are considered private MSBuild variables by convention but in this case it is relatively easy way to accomplish the xCopy solution. Even in future versions of VS if this property changes I am hopeful there will be alternate/easier way to do this. In general if you can set up the Publishing on your web server using Web Deploy I think it will yield you longer term advantages and I think it is a worthwhile endeavor to take.
· Projects To Build - When you have only one web application and class libraries then it is easier to just have the Project (CSProj or VBProj) to build as shown in my example above, but if you have bunch of projects which all need to built then you might have to go with Solution Build option (.SLN).
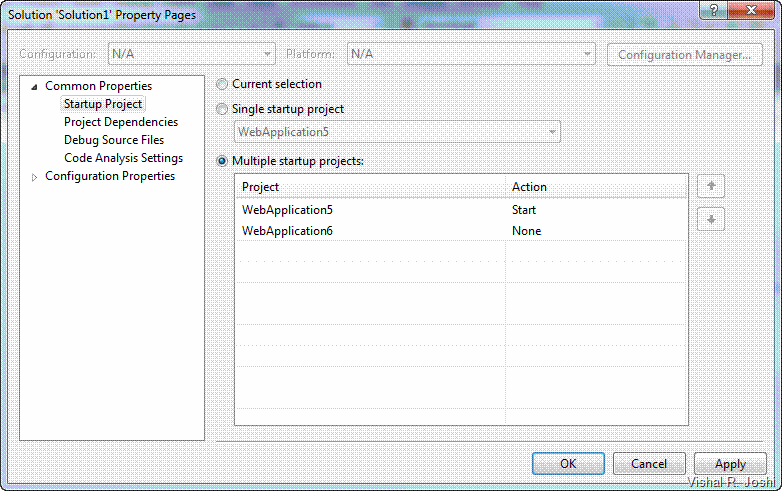
Deployment for Web Apps is feasible at both Solution as well as Project build level although when it comes to Solution Build then you might want to make sure that the properties you are passing at Solution level will apply to all the projects in the solution which might not always the outcome you desire. In that situation all these properties can be set within the .csproj or .vbproj files too. You can do that by unloading your project file and in the top <PropertyGroup> section just add above properties as you like:
For e.g /p:DeployOnBuild=True can be added as <DeployOnBuild>True</DeployOnBuild>
Step 11: Trigger your Build Definition
Now that you have everything configured you can right click on the Build Definition and hit “Queue New Build”.. That will show you a dialog which you can simply hit OK on and you should soon get your Build ready and the site deployed as shown in my case below:

After a while when you check into the Completed section of the build you should see your new build lined up.

On inspecting the IIS and SQL Server you can see my sites & DBs are also deployed.
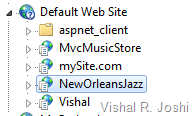
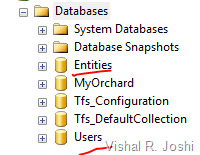
Finally on running the application it runs great too:
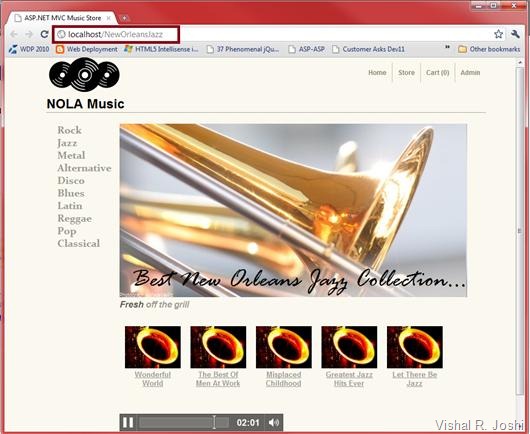
This was actually a combination of setting up my DB deployment settings too, to learn more about configuring your deployment in the right way check out TOC on Web deployment.
PS: If you get an error on TFS like below:
TF215097: An error occurred while initializing a build for build definition \TechEd-US-2010\MvcMusicStore: There was no endpoint listening at http://MyServer:9191/Build/v3.0/Services/Controller/1 that could accept the message. This is often caused by an incorrect address or SOAP action. See InnerException, if present, for more details.
Then most likely you do not have your Build Service running, you can enable it by going to Start à All Programs à Team Foundation Administration Console à Build Configuration.
Conclusion
Hopefully this will get you going with your automated web deployments. Please write back if you feel anything is missing or if you have any other questions. If you have questions like how would you configure what gets deployed, how to set up DB deployment, how to change web.config etc etc we have tons of articles on how to customize your deployment. You can look at a whole list of them at Overview of Web Deployment
Hope this helps
Vishal
![clip_image002[4] clip_image002[4]](http://lh6.ggpht.com/_E8t3edIzcC8/TPdW5w8jnMI/AAAAAAAABKI/1Z7FW0zUV7Y/clip_image002%5B4%5D%5B2%5D.jpg?imgmax=800)
![clip_image004[4] clip_image004[4]](http://lh3.ggpht.com/_E8t3edIzcC8/TPdW7ih1WmI/AAAAAAAABKY/DQlb9IyUzYs/clip_image004%5B4%5D%5B2%5D.jpg?imgmax=800)


![clip_image002[18] clip_image002[18]](http://lh3.ggpht.com/_E8t3edIzcC8/TMaXPpyavoI/AAAAAAAABGw/2jSLpvS6T2U/clip_image002%5B18%5D_thumb.jpg?imgmax=800)
![clip_image004[4] clip_image004[4]](http://lh5.ggpht.com/_E8t3edIzcC8/TMaXQpOYI_I/AAAAAAAABG4/mLXaG2aeGRw/clip_image004%5B4%5D_thumb.jpg?imgmax=800)
![clip_image006[4] clip_image006[4]](http://lh6.ggpht.com/_E8t3edIzcC8/TMaXRIJ3yEI/AAAAAAAABHA/ihvSqlZzAKM/clip_image006%5B4%5D_thumb.jpg?imgmax=800)
![clip_image008[4] clip_image008[4]](http://lh5.ggpht.com/_E8t3edIzcC8/TMaXR4Cr2mI/AAAAAAAABHI/hx45j_tHfFo/clip_image008%5B4%5D_thumb.jpg?imgmax=800)
![clip_image010[4] clip_image010[4]](http://lh4.ggpht.com/_E8t3edIzcC8/TMaXSrDj3zI/AAAAAAAABHQ/s0FuP37tHn0/clip_image010%5B4%5D_thumb.jpg?imgmax=800)


